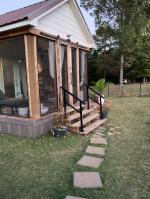
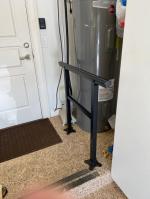
I used this to help my mom with steps up from a sidewalk to a back patio. You will need a hammer drill, a 3/8" masonry bit, a sharpie marker and patience. I pre-assembled the rails to the post loosely. When doing this, it does make a difference which way you position it. The rail has a deeper cut for the bottom of the rail to allow for adjustment when viewed from the side. The escutcheon to cover the bolts in the base of the post should go on at this time, or you won't get them on because they are a solid piece, but you can use tape to get them out of the way.Set the post where you intend to use it, and use the sharpie to mark the holes. Move it out of the way and use tape on your drill bit to mark the depth of the bolts. Drill the holes, clean away the debris, place posts in position, tap bolts into place. I used a 14 mm socket on an extension with my socket wrench, and tightened the bolts gradually, much like putting on a car tire. Once the bolts were in place, I let the escutcheon down and used the hex tool provided to tighten the rails. I would recommend black outdoor caulk as a final step, but I haven't done that part yet myself. The finished product was solid, and I was grateful that there was room to use a socket wrench, as I watched a video on YouTube for another brand, and they has to tighten by hand because the holes were so close to the post.Overall, it took me 60 minutes to install, but that included setting up the hammer drill I bought, working with my mom, and being the first time I had ever done this type of install into concrete. If you have experience, it would surely take you less time!


